
So what is it about Angel Pro Gelly Polishes that make me so in love with them, you may ask....and my answer will be, everything about them!
1) They have a wide range of colors now as I'm typing this! Their initial launch consist of 47 colors, of which includes pretty pastel colors which the other brands are lacking in.
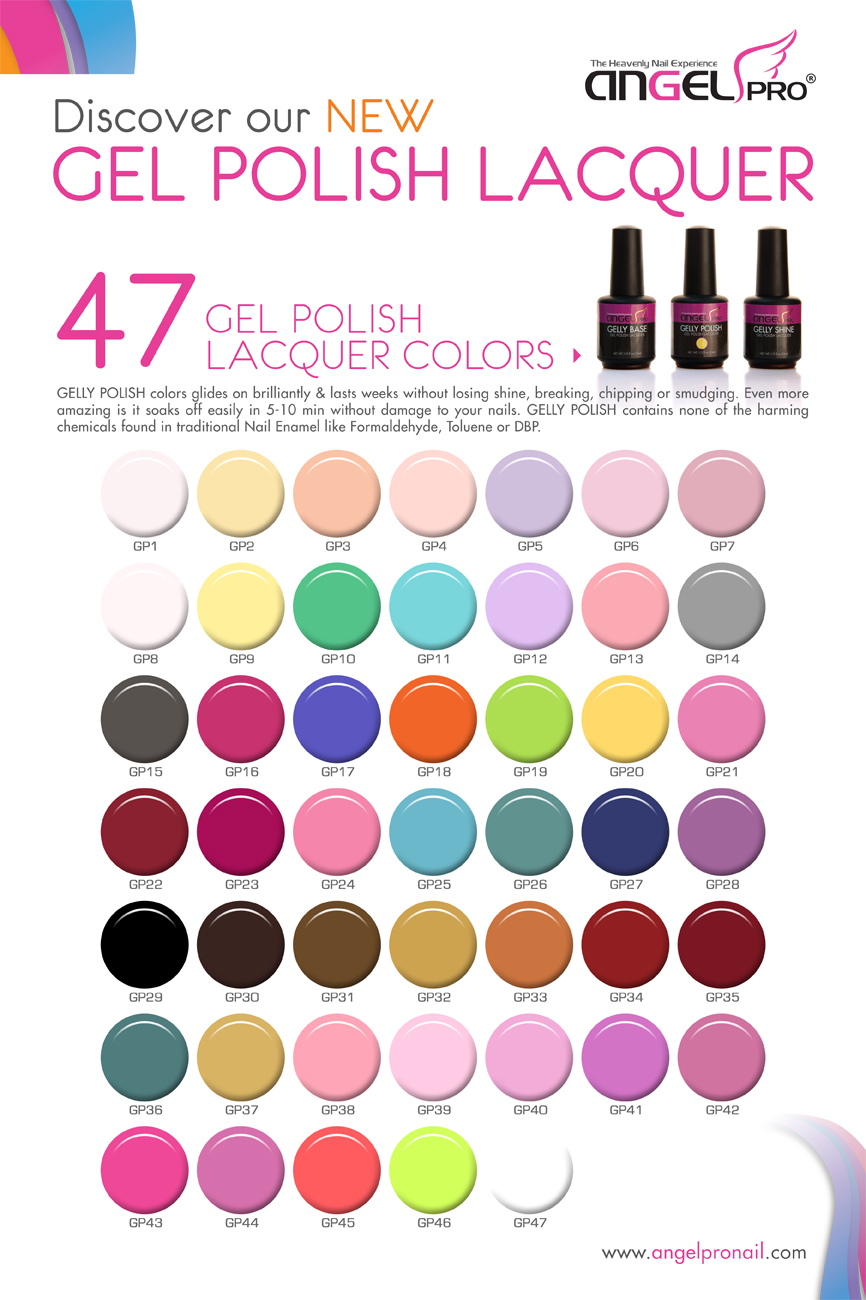
As of today, they have released another 100 new shades, packed of glitters and shimmers and metallics! Check out this color chart! Super drool-worthy!
.jpg)
2) It is 100% gel; colors are much more opaque and dense. You can get away with 2 coats for full opacity for most colors, and brilliant for nail art so you don't have to worry about unclear lines anymore!
3) It does not contain any of the harmful chemicals usually found in nail polish; Formaldehyde, Toluene or DBP. Super safe to use!
4) Quick and easy application! There is no need to apply a dehydrator, or "PH Bond" like other brands before applying base coat. There is also no need to remove shine from the nails with harsh nail files; buff gently with Angel Pro Buffer! All these, means that the Angel Pro Gelly base coat has incomparable bonding ability!
5) Easy removal! There is no need to file off Angel Pro Gelly Shine, just soak-off straight away in 5-10 minutes without damage to your nails!
6) Last but not least, super important point...... The colors do not fade at all even after 3-4 weeks of wear! Unlike certain colors from Harmony Gelish which have a problem of fading after a few days.....
Are you excited about Angel Pro Gelly Polishes yet?! Let's move onto the step-by-step tutorial for using the Angel Pro Gelly Polish system, and I have also included a simple art tutorial using Angel Pro Gelly Polishes as well!
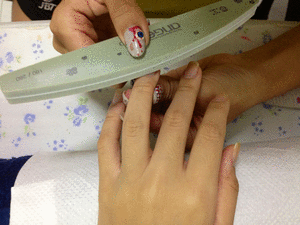


Before using the Angel Pro Gelly Polish system, you'll have to prep your nails first! Shape them, buff them, push back your cuticles, and clean the nails with Acetone!
.JPG)
.JPG)
2. Apply a layer of Angel Pro GELLY BASE on the prepped nails.
.JPG)
.JPG)
4. Apply an even layer of Angel Pro Gelly Polish on to the entire nail. Avoid touching the skin! I have used GP10, a bright shade of green for my nail model here. Cure in the LED/UV light again.
.JPG)
5. Apply a second layer if required to reach full opacity and cure!
6. Nail art time! I used a striping brush for the art to create the lines, invest in them to create straight lines! As well as, remember to cure each layer of nail art before adding on the next layer!

7. After your nail art is completed, apply a layer of Angel Pro Gelly Shine for long lasting and beautiful shine! Similarly, cure in the LED/UV light.
.JPG)
8. Finally, dampen a cotton pad or a lint-free wipe with Angel Pro Gel Cleanser and clean the nail with the cotton pad/lint-free wipe to remove the sticky residue on the nail surface!
.JPG)
9. And your nails are now ready! Apply cuticle oil around the cuticle area to moisturize! Pretty nails!


.JPG)
.JPG)
I hope the tutorial has been helpful! If you want to find out more, you can visit the Angel Pro website, or you can contact my Nail school (who is the official local distributor)!


No comments:
Post a Comment